|
Using Human Papillomavirus (HPV) detection tests for cervical cancer screening and managing HPV-positive women – a practical guide / Activity 5Procedure to collect samples for HPV testing – Steps for collection of cervical samples |   | .png)
Click on the pictures to magnify and display the legends
|
- Note the characteristics of the discharge (if any) in the vagina or at the external os of the cervix.
- Sometimes the cervix may not be visualized properly because of excessive discharge covering the cervix. If needed, use a sterile cotton swab soaked in normal saline to gently clean the cervix. However, cleaning the cervix is not necessary as a routine step before collecting samples for HPV testing and should be avoided if possible.
- Look for the presence of obvious growths or ulcers on the cervix.
- Try to identify the SCJ as the junction between the pink smooth squamous epithelium and the red granular columnar epithelium.
- Note the location of the SCJ in relation to the external os. If the SCJ is completely inside the endocervical canal, the columnar epithelium cannot be visualized and the entire ectocervix is covered by pink squamous epithelium.
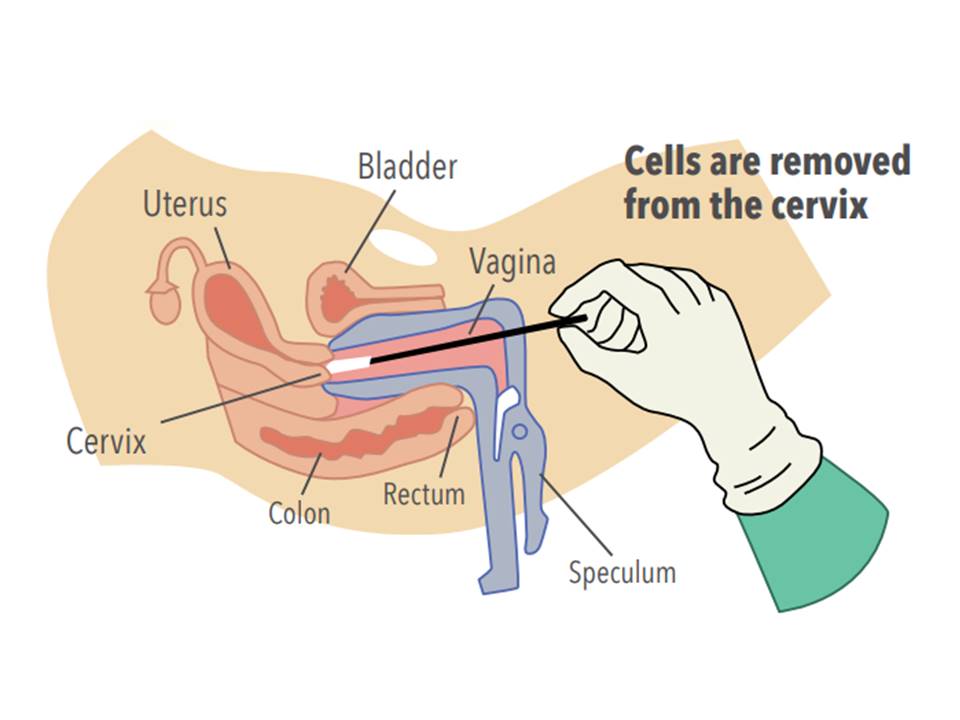
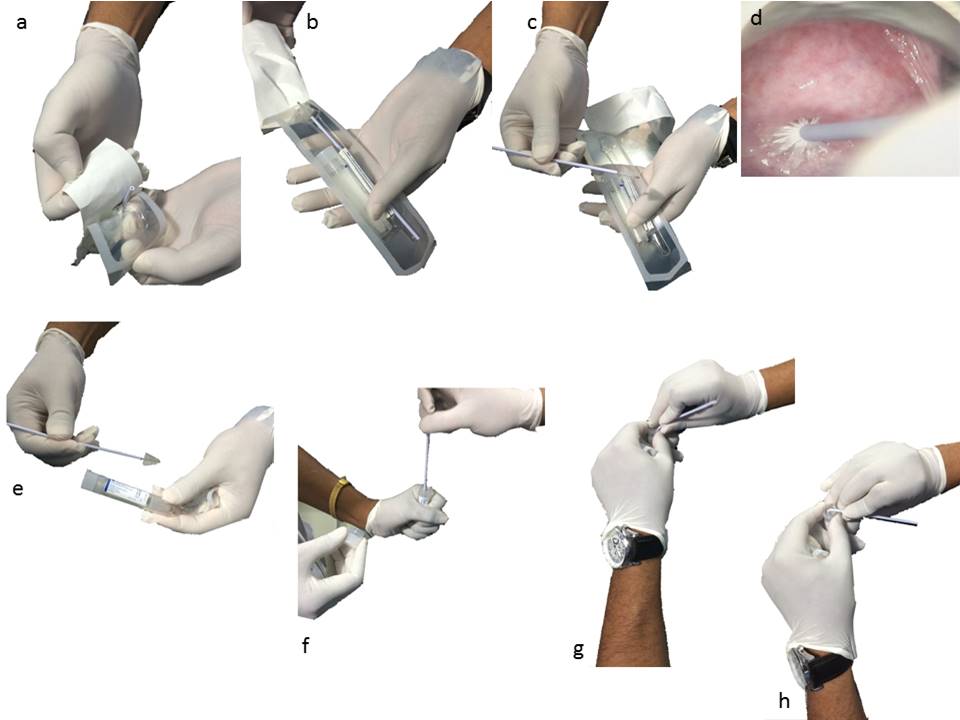
- Insert the sample collection brush or broom into the external os until the outer or lower bristles touch the ectocervix (do not insert the brush or broom completely into the endocervical canal).
- Rotate the brush or broom in a clockwise direction 5 or 6 times (check the manufacturer’s instructions, which may be different), maintaining gentle pressure on the cervix.
- Remove the brush or broom from the canal while avoiding contact of the outside of the brush or specimen with any other object.
- Insert the end of the brush or broom into the specimen collection tube, and swirl it to rinse it thoroughly in the liquid.
- If using a brush, snap off the shaft of the brush at the score line, leaving the end of the brush inside the tube.
- If using a broom, detach the broom from the end of the shaft, leaving the broom inside the tube.
- Replace the cap on the tube, and tighten it securely.
- Place the tube in a specimen bag or container for transportation to the laboratory.
- Make sure that the laboratory requisition form accompanies the sample.
|  |  |
|
| 


